
Cool King – 7-Year White Reflective Elastomeric Roof Coating
 Elastomeric Rv White Roof Coating
If you think you'll be saving the roofing decking plywood (not replacing it), then you may save yourself some cleanup problem by removing the components initially and after that peeling up the rubber! Detail of water damage on camper roofing system. More water damaged areas on RV roofing decking. There was nothing actually horrible that made me feel like I was going to fall through, however certainly a great deal of damage and I was getting the sensation I would be replacing a great deal of the roofing system decking plywood.
 How Long Do Elastomeric Roof Coatings Last?
Visit Our Website: https://www.openlearning.com/u/javier-qhqwhg/blog/ExpancelForElastomericCoolRoofCoatings/
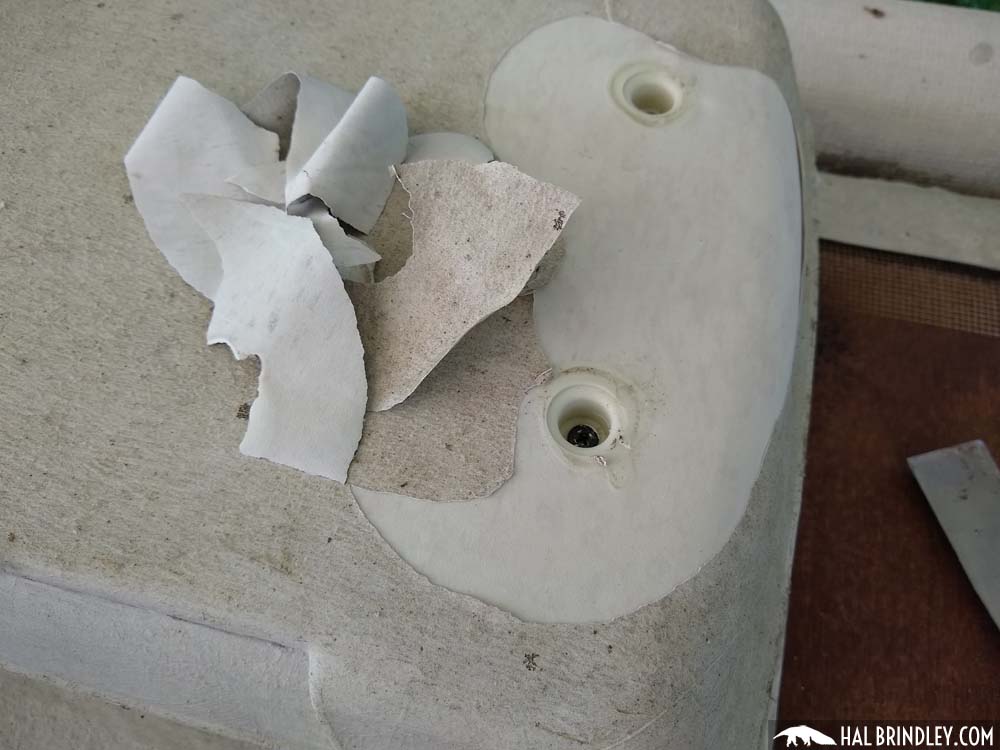
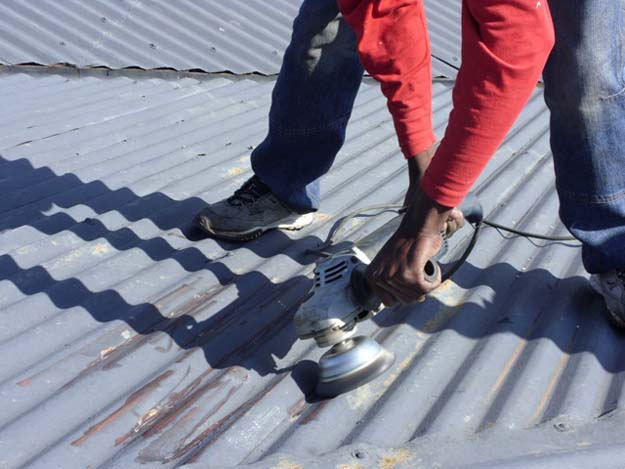
I chose the simplest one first, a vent cap from a cooking area sink plumbing vent pipeline. Beginning to scrape caulk and sealant. I used a stiff scraper with a chisel-like blade and simply started spying and chipping and scraping and hacking. There is no other method around this, you just need to start digging up until you expose the screw heads.
Loosening the screws in vent cap. The screws on this vent cap were hex-head metal screws so I utilized a small socket driver to eliminate them. Some came out tidy. Others were rusted and I needed to use a vice-grip pliers to grab the heads and turn them little bit by little.
I discovered an old wasp nest inside the vent cover. This is a sight I'll most likely have to get utilized to, finding the remains of animal habitation in every nook and cranny. I spend a horrible great deal of my time developing excellent wildlife habitat in my lawn so I do not get upset when a creature selects to set up home in my RV.
Tips For Applying Your Elastomeric Roof Coating
Fortunately nobody was home in this old nest so I just tossed it. Possibly I'll put a screen over it when changing it. Which brings us to the next point. You need to try not to harm these pieces (like vent covers and caps) as you're removing the old caulk and sealant just in case you need to use them once again.
(Think I'll discover when the roofing system is done!) Prying up the vent cap and eliminating the last ring of rubber roof beneath. So I pried up the rest of the cap and scraped up the staying rubber roof and butyl tape and putty and 25 years of other gunk and here's how it looks cleaned up.
 How-to: Apply Cool Roof Coating
One down, 7 more components to go. Next I chose to deal with the only roofing system ventilation fan that my camper has. My roofing vent likewise had a vent cover over it. So I started scraping the gunk from those screws. Beginning on the roof vent. Hardware exposed on roofing system vent cap, the very first nut came off clean.
 Jetcoat Cool King Reflective Acrylic Roof Coating, Waterproof
Bolt is spinning. The fasteners on this RV roof vent cover were nuts on little bolts. The very first one came off great with an extension socket set. The second one just started spinning, suggesting the bolt was not fixed in place but turning in addition to the nut. Disappointment. A peek at the hardware holding down the roof vent cover.
Elastomeric Roof Coating - Liquid Roof Coating Cost Pros & Cons 2021
I didn't have any excellent way to hold the bolt in location so rather I decided to saw through the bolts with a reciprocating saw. Sawing through bolts on roof vent cover. I utilized a cordless reciprocating saw with a metal-cutting blade however it was tricky to get the blade flat adequate to reach the bolts so near the roof deck. Many were so old and rusted that they sheared off when I loosened then with a great deal of force. Unscrewing the brackets that held the vent cover in place. Then I scraped more caulk and roof sealant off the flange of the roof vent itself. I quickly discovered there were no more screws or hardware holding it down so I provided up on the scraping and went inside the RV After scraping the caulk and sealant from flange of roofing vent, say goodbye to screws! Loosening the within cover plate of roofing system vent fan in RV restroom.
A couple sheared off with a great deal of force, but two would not budge. So I needed to drill out the screw heads. I chose a drill bit near the size of the shaft of the screws that I had already taken out and began drilling. Selecting a drill bit for drilling out a screw head.
Shatterproof glass advised. So I drilled out the heads, one popped off and the other I was getting upset with and offered it a yank prior to it was drilled through. Rather of popping off the screw head, the plastic just dissolved around the hot screw head. Whoops. Hope I do not need to recycle this cover.
If not, I'll need larger screw heads when re-assembling. Cover plate removed from roofing system vent. Next I found little corner brackets with hex-head bolts holding them in. I loosened them (all came out great luckily) and pulled out the brackets and little white plastic spacers. Unscrewing corner brackets in roof vent.
White-seal 100% Acrylic Elastomeric Reflective Roof
https://www.youtube.com/embed/1q244d2jlBw
All corner brackets got rid of, all set to pull out. When the brackets were out I returned up leading to pry out the the roofing system vent. Then I scraped up all the staying gunk and rubber roof. Taking off the old roofing vent. There are two wires running to the roofing vent (a black hot wire and a white neutral wire) that you'll need to clip to eliminate the old vent.

Flat Roof Coatings
May you like the Best Recreational Vehicle Roofing Sealant Exhaust vents Visible cracks Unsealed edges and corners Wirings entering the roofing system Antennas Around the exhaust fans and air conditioner The process is easy. All you require to do is to In this method, you do not need to use a chemical remover, but then, it might not use throughout all roof sealants.
You shouldn't interrupt the Recreational Vehicle roofing system to prevent a larger problem, such as harming the other portions of the roofing system. In addition, some owners likewise utilize a hair drier in getting rid of a rubber roofing system sealant, which is quite practical and easy if you're handling cold weather condition. On the other hand, you can likewise describe the product handbook that features the sealant that you acquired.
A few of them recommend utilizing a putty knife that can eliminate the roofing system sealant. Others can recommend using a heat gun to take it out. You can think about any of these basic techniques to get rid of the set and dried sealant, especially if you require to reapply the sealant or you have made an error.
My Sources: https://www.openlearning.com/u/javier-qhqwhg/blog/ExpancelForElastomericCoolRoofCoatings/
It can likewise seal around the edges and corners so that they remain leak-proof. Utilizing a sealant, you can likewise keep your Recreational Vehicle cool and dry on any weather condition. However, you might in some cases need to get rid of the old rubber roofing system coating due to the fact that you need to reapply a brand-new one or correct some application errors.
Pro-q 7-year White Elastomeric Roof Coating
With it, you can use a brand-new one to continue gaining its advantages, such as avoiding water damage, saving money and avoiding substantial repairs. All these can also extend your RV's life expectancy and promote the convenience of everyone aboard your car.
 Best Practices For Roof Coating Application
( This post might include affiliate links. For more info go to our Privacy page.) My RV roof that requires to be replaced! Invite to my Recreational Vehicle Restoration Series!.?.!! So you want a Recreational Vehicle however can't afford one. If you're like me and have more time than cash, then possibly your finest option is to buy an old RV and fix it up.
All old RV's do! Time to consider an! I know, a Recreational Vehicle roofing replacement can seem like an impossibly tough task. I get it. I bought my RV over a year back and didn't have the guts to start tackling this job until today. However I'm here to tell you, if I can do it, you can do it.
It has only 55,000 miles and all the appliances work and I like the design. The catch? Water damage! I have actually never ever dealt with a Recreational Vehicle prior to and I need to confess, I'm frightened. I have actually done a lot of house improvement and I'm still scared. That's due to the fact that this is all new to me and I have no idea what to anticipate.
Foam Roofing Advantages: The Benefits Of Elastomeric Roof Coating
 Spraying Elastomerics And Roof Coatings – A Complete Guide
So my very first action (that I actually did many months ago when I bought the camper) was making a shelter so I might work without rain gathering. I purchased a 12 x 26 SuperMax Canopy by ShelterLogic (over $450 on Amazon but I bought mine from Northern Tool for about $340!) and boosted the legs with wood extensions to make the canopy high enough that I might stand on the roofing system and walk underneath it.
It appears like there are no canopies readily available that are tall adequate to function as a RV carport. You could buy a real metal roof Recreational Vehicle carport however those are way more expensive, generally $2000 and up! Also these do not generally have enough clearance above for you to work on the roofing system.
I calculated the expense of doing it that method (wood framing) and it came out to a comparable rate as purchasing this canopy. I figured I would rather have it semi-portable so I went with the canopy, plus this permits me to change the height up and down when I need to.
Eventually those bent during a wind storm. Then I sawed 1 1/4 square legs from 24's to put inside the canopy legs (again holding the canopy up with pipeline clamps.) and reinforcing the 4 corners with an extra 24 screwed to it. This is still a little floppy. I most likely should have handed over for some stiff steel pipeline from the start.
Jetcoat Cool King Reflective Acrylic Roof Coating, Waterproof
Just be sure to stake the corners down with rope if you have any wind! I raised a 12 x 26 canopy to cover my workspace. Time to climb and have a look at a few of the problem areas on my old EPDM roofing system. EPDM is the most typical sort of rubber roofing found on campers.
Fractures in the EPDM roofing at edge of camper. An old patch task on the RV rubber roof. Loads of caulk stacked over old issue areas. As you can see, this roof has actually had a lot of issues over the years. Looking from the within the camper there have plainly been leakages in numerous locations of the roof.
I grabbed an utility knife and started slicing. The first thing I discovered is that there were 2 layers. On the bottom is the initial EPDM rubber roofing system layer. I understand it's EPDM rubber and not TPO rubber because of the black backing. (TPO roof is white on both sides.) On top of my EPDM roofing system is a thin Recreational Vehicle roofing system coating that was applied later.
I just left the roofing system coating adhered to the EPDM roofing and pulled them up together. (You don't need to peel them up individually.) Starting to remove roofing finishing. Peeling up section of the bottom layer of rubber. This reveals that the original RV roof was EPDM because of the black support.
A Coatings Specialist Explains How To Correctly Apply Roof Coating
 How To Apply Elastomeric Paint (With Pictures)
https://www.youtube.com/embed/I9XFJc-f9cA
I cut lines with an utility knife around fixtures. All rubber roof removed from camper. This action went pretty quickly. There was an adhesive under the bottom layer of rubber that was still pretty well stuck in many locations, however with an excellent little bit of force it peeled up cleanly.

Elastomeric Roof Coating
 10-year Premium White Elastomeric Roof Coating
If you believe you'll be conserving the roofing decking plywood (not replacing it), then you might save yourself some cleanup difficulty by getting rid of the components initially and after that peeling up the rubber! Detail of water damage on camper roofing. More water harmed areas on Recreational Vehicle roofing decking. There was nothing actually dreadful that made me seem like I was going to fail, but definitely a great deal of damage and I was getting the feeling I would be changing a lot of the roof decking plywood.
 30 Roof Coating Ideas
I Thought About This: http://rylanlwou045.xtgem.com/elastomeric%20roof%20coatings%20for%20leaks%20repair%20and%20maintenace
I went for the simplest one initially, a vent cap from a cooking area sink plumbing vent pipe. Starting to scrape caulk and sealant. I utilized a stiff scraper with a chisel-like blade and simply started spying and breaking and scraping and hacking. There is no other method around this, you just need to start digging up until you expose the screw heads.
Unscrewing the screws in vent cap. The screws on this vent cap were hex-head metal screws so I utilized a small socket motorist to remove them. Some came out clean. Others were rusted and I needed to utilize a vice-grip pliers to grab the heads and turn them bit by bit.
I found an old wasp nest inside the vent cover. This is a sight I'll most likely have to get used to, discovering the remains of animal habitation in every nook and cranny. I spend a dreadful lot of my time developing excellent wildlife environment in my yard so I don't get upset when a creature picks to set up home in my RV.
Elastomeric Coatings For Metal Roofs
Thankfully nobody was home in this old nest so I just tossed it. Possibly I'll put a screen over it when replacing it. Which brings us to the next point. You should attempt not to damage these pieces (like vent covers and caps) as you're scraping off the old caulk and sealant simply in case you need to utilize them again.
(Guess I'll discover when the roofing system is done!) Prying up the vent cap and removing the last ring of rubber roof beneath. So I pried up the remainder of the cap and scraped up the staying rubber roof and butyl tape and putty and 25 years of other gunk and here's how it looks tidied up.
 How To Apply Elastomeric Roof Coating
One down, 7 more components to go. Next I decided to deal with the only roof ventilation fan that my camper has. My roof vent likewise had a vent cover over it. So I began scraping the gunk from those screws. Beginning on the roofing vent. Hardware exposed on roof vent cap, the very first nut came off tidy.
 A Coatings Specialist Explains How To Correctly Apply Roof Coating
Bolt is spinning. The fasteners on this RV roof vent cover were nuts on little bolts. The first one came off great with an extension socket kit. The 2nd one simply began spinning, implying the bolt was not repaired in place but turning along with the nut. Bummer. A peek at the hardware holding down the roofing system vent cover.
Quick Setting Elastomeric Roof Coating
I didn't have any excellent way to hold the bolt in place so rather I decided to saw through the bolts with a reciprocating saw. Sawing through bolts on roof vent cover. I utilized a cordless reciprocating saw with a metal-cutting blade but it was difficult to get the blade flat enough to reach the bolts so near to the roofing deck. Many were so old and rusted that they sheared off when I loosened then with a lot of force. Loosening the brackets that held the vent cover in location. Then I scraped more caulk and roof sealant off the flange of the roof vent itself. I quickly discovered there were no more screws or hardware holding it down so I provided up on the scraping and went inside the Recreational Vehicle After scraping the caulk and sealant from flange of roof vent, no more screws! Loosening the within cover plate of roofing vent fan in Recreational Vehicle restroom.
A couple sheared off with a great deal of force, but two wouldn't budge. So I needed to drill out the screw heads. I chose a drill bit near the size of the shaft of the screws that I had currently taken out and began drilling. Selecting a drill bit for drilling out a screw head.
Security glasses suggested. So I drilled out the heads, one popped off and the other I was getting frustrated with and gave it a pull before it was drilled through. Rather of popping off the screw head, the plastic just disappeared around the hot screw head. Whoops. Hope I do not need to recycle this cover.
If not, I'll need broader screw heads when re-assembling. Cover plate eliminated from roofing vent. Next I discovered little corner brackets with hex-head bolts holding them in. I loosened them (all came out fine fortunately) and took out the brackets and little white plastic spacers. Loosening corner brackets in roof vent.
Cool King – 7-year White Reflective Elastomeric Roof Coating
https://www.youtube.com/embed/IR9lRAMiHLk
All corner brackets removed, ready to take out. Once the brackets were out I returned up top to pry out the the roof vent. Then I scraped up all the staying gunk and rubber roof. Raising off the old roofing system vent. There are two wires going to the roofing system vent (a black hot wire and a white neutral wire) that you'll need to clip to eliminate the old vent.

Uniflex Elastomeric Coating System For Metal Roofs
 Kool Seal Premium 10 Year Elastomeric Roof Coating
If you believe you'll be conserving the roofing system decking plywood (not replacing it), then you might conserve yourself some cleanup trouble by getting rid of the components initially and after that peeling up the rubber! Information of water damage on camper roofing system. More water harmed areas on RV roofing decking. There was nothing truly dreadful that made me feel like I was going to fall through, however absolutely a great deal of damage and I was getting the sensation I would be changing a great deal of the roofing system decking plywood.
 Roof Coat Elastomeric Coating Product Data Sheet
Your Domain Name: http://rylanlwou045.xtgem.com/elastomeric%20roof%20coatings%20for%20leaks%20repair%20and%20maintenace
I opted for the most basic one first, a vent cap from a cooking area sink pipes vent pipeline. Beginning to scrape caulk and sealant. I used a stiff scraper with a chisel-like blade and just started spying and breaking and scraping and hacking. There is no other way around this, you simply have to begin digging until you expose the screw heads.
Loosening the screws in vent cap. The screws on this vent cap were hex-head metal screws so I utilized a little socket motorist to eliminate them. Some came out tidy. Others were rusted and I had to utilize a vice-grip pliers to get the heads and turn them bit by little.
I found an old wasp nest inside the vent cover. This is a sight I'll most likely need to get utilized to, discovering the remains of animal habitation in every nook and cranny. I invest an awful lot of my time developing good wildlife environment in my lawn so I don't get upset when a creature picks to set up house in my RV.
Roof Coating Specialists
Luckily no one was home in this old nest so I simply tossed it. Possibly I'll put a screen over it when changing it. Which brings us to the next point. You need to try not to damage these pieces (like vent covers and caps) as you're removing the old caulk and sealant just in case you need to use them once again.
(Guess I'll learn when the roof is done!) Prying up the vent cap and eliminating the last ring of rubber roof beneath. So I pried up the rest of the cap and scraped up the remaining rubber roofing and butyl tape and putty and 25 years of other gunk and here's how it looks cleaned up.
Myths, Facts, And The Truth About Silicone And Elastomeric Roof Coatings
One down, 7 more fixtures to go. Next I chose to tackle the only roof ventilation fan that my camper has. My roof vent also had a vent cover over it. So I started scraping the gunk from those screws. Starting on the roof vent. Hardware exposed on roofing vent cap, the very first nut came off clean.
 Elastomeric Rv White Roof Coating
Bolt is spinning. The fasteners on this Recreational Vehicle roofing vent cover were nuts on small bolts. The very first one came off great with an extension socket kit. The 2nd one simply began spinning, indicating the bolt was not fixed in location however turning along with the nut. Downer. A peek at the hardware holding down the roofing vent cover.
Acrylic Roof Mastic
I didn't have any good way to hold the bolt in location so rather I decided to saw through the bolts with a reciprocating saw. Sawing through bolts on roofing system vent cover. I used a cordless reciprocating saw with a metal-cutting blade but it was tricky to get the blade flat enough to reach the bolts so near the roofing deck. The majority of were so old and rusted that they sheared off when I unscrewed then with a lot of force. Loosening the brackets that held the vent cover in place. Then I scraped more caulk and roofing sealant off the flange of the roofing system vent itself. I quickly found there were no more screws or hardware holding it down so I provided up on the scraping and went inside the Recreational Vehicle After scraping the caulk and sealant from flange of roof vent, no more screws! Unscrewing the within cover plate of roofing system vent fan in RV bathroom.
A couple sheared off with a great deal of force, however 2 would not budge. So I had to drill out the screw heads. I picked a drill bit near the size of the shaft of the screws that I had currently taken out and began drilling. Selecting a drill bit for drilling out a screw head.
Shatterproof glass suggested. So I drilled out the heads, one popped off and the other I was getting frustrated with and provided it a pull before it was drilled through. Rather of popping off the screw head, the plastic just dissolved around the hot screw head. Whoops. Hope I don't have to recycle this cover.
If not, I'll need broader screw heads when re-assembling. Cover plate eliminated from roof vent. Next I discovered little corner brackets with hex-head bolts holding them in. I loosened them (all came out great the good news is) and pulled out the brackets and little white plastic spacers. Unscrewing corner brackets in roofing vent.
Technical Data Sheet Elastomeric Roof Coating
https://www.youtube.com/embed/IR9lRAMiHLk
All corner brackets got rid of, ready to take out. When the brackets were out I went back up top to pry out the the roof vent. Then I scraped up all the staying gunk and rubber roofing. Lifting off the old roof vent. There are two wires going to the roof vent (a black hot wire and a white neutral wire) that you'll need to clip to get rid of the old vent.

Pro-Q 7-Year White Elastomeric Roof Coating
Search Images Maps Play YouTube News Gmail Drive More Assist Report a problem about Google Groups Keyboard faster ways Check in.
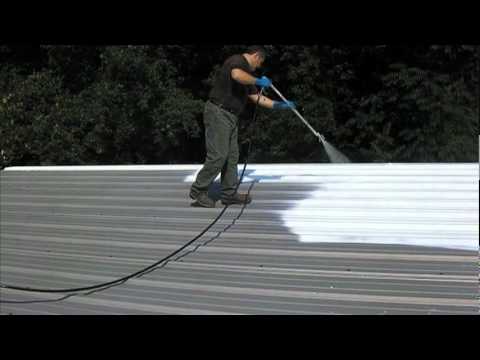
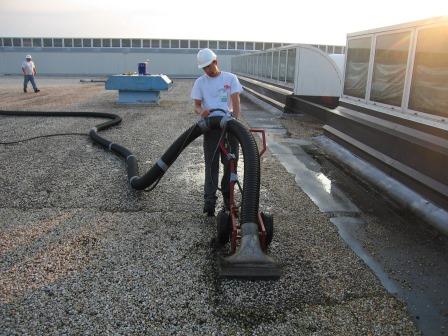
Chalking is a grainy residue on the roofing surface area arising from destruction of that material from direct exposure. It is NOT from settled dirt. Chalk must be eliminated by cleaning in order for the used finishes to have correct adhesion. The best method to clean your roof is to power-wash the surface.
 Roof Coating Contractor For Elastomeric Roof
We suggest you scrub the roofing with water and TSP (Trisodium Phosphate) option to remove all dirt, oils, grease and chalk. POINTER: Prior to finishing begins, roofing surface area must be contacted tape to see if it is actually clean. If the tape pulls off tight and uniformly, the surface is tidy.
KEEP IN MIND: If no quantity of cleansing produces a sufficient tape pull, a guide ought to be considered. The 3 M's Mildew, Moss and Mold, are usually fuzzy, greenish or bluish-grayish-white and THEY'RE ALIVE. Cement and tile roofs are particularly susceptible to mildew since they include minerals which are required to support growth.
Read The Article: https://www.openlearning.com/u/javier-qhqwhg/blog/ExpancelForElastomericCoolRoofCoatings/
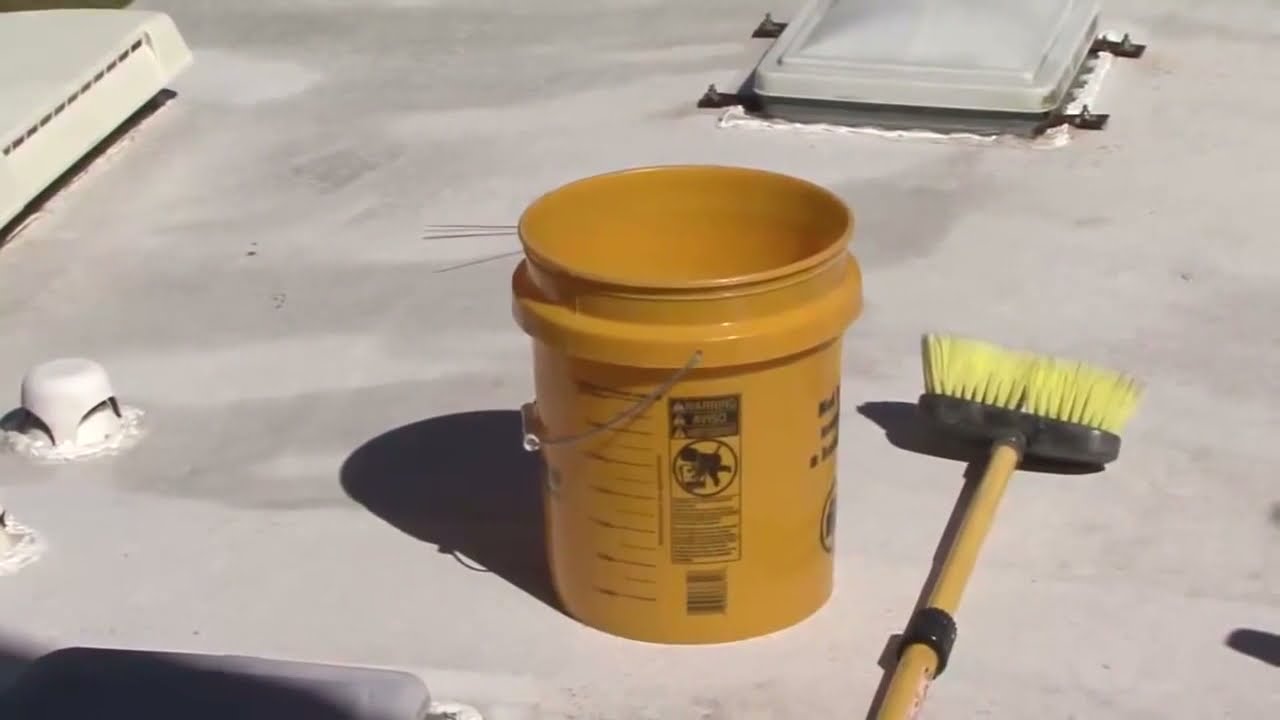
To safeguard your roofing, provide appropriate drain and expose shaded areas to sunlight where possible. Vulnerable areas that can not be fixed need to be cleaned with a chlorine bleach solution twice each year. Clean the roof surface by power-washing or scrubbing with TSP (Trisodium Phosphate). Treat mildewed areas with a chlorine bleach service.
Follow the Kool Seal easy 3-Step Process for the Moss: really little plants that grow in silky, green clusters on moist surfaces. Mold: a downy or furry growth on the roofing system surface caused by fungi, specifically in the presence of dampness or decay. Mildew: a fungi that can appear on a surface when exposed to moisture, it appears as a thin, furry, whitish discoloration.
Expancel For Elastomeric Cool Roof Coatings
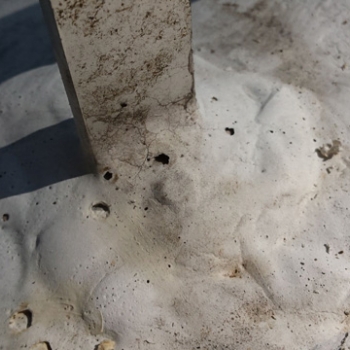
It is essential to seal your roofing system as soon as you see signs of alligatoring. If the surface area is left unprotected, it can deteriorate beyond a point where a roofing coating will work. Remove loose previous coating. Tidy the roofing with water and TSP (Trisodium Phosphate). Rinse completely and let dry.
Usage to reinforce patching cement on all cracks. If your roof appears like this, see a roofing expert and have it replaced. This is what takes place to asphalt if it's left exposed and unguarded. The finest way to avoid this from happening to your roofing system is to spot and reinforce all cracks with or.
Like Blister on your skin, blisters on a built-up roofing system (or BUR) occur when water gets caught under the leading layers of the surface area. With a bit of work you can remove this problem from your roofing. If in doubt, speak with a licensed Roof Expert. Remove loose previous covering.
Rinse completely and let dry. On blistered areas, cut an X through the whole blister and permit wetness to evaporate and dry thoroughly before patching. Patch withor, the use to strengthen patching cement over the blister and on all cracks. Leading coat with a for the best efficiency. Imagined left is a condition called loose lap.
With a little work you can eliminate this issue from your roof. If in doubt, seek advice from a licensed Roofing Specialist. Prepare the surface area per package directions. Safe loose laps in place with, and after that use to reinforce patching cement on all cracks. Leading coat with a or for the finest efficiency.
This condition is referred to as "fishmouthing". If left unattended, fishmouths might permit water penetration into the roof system. With a little bit of work you can eliminate this problem from your roof. If in doubt, speak with a certified Roof Professional. If loose edges extend back only a number of inches, the loose material may be snipped off and disposed of.
Jetcoat Cool King Reflective Acrylic Roof Coating, Waterproof
Trim flaps so they lie flat. Seal with and reinforce with. Then leading coat the whole roof surface with a or for the best efficiency.
Check your Lexis roofing covering system frequently. Keeping the roofing system tidy and without debris will offer you optimal performance and longer service life. Touch up any damaged areas immediately to prevent substrate deterioration.
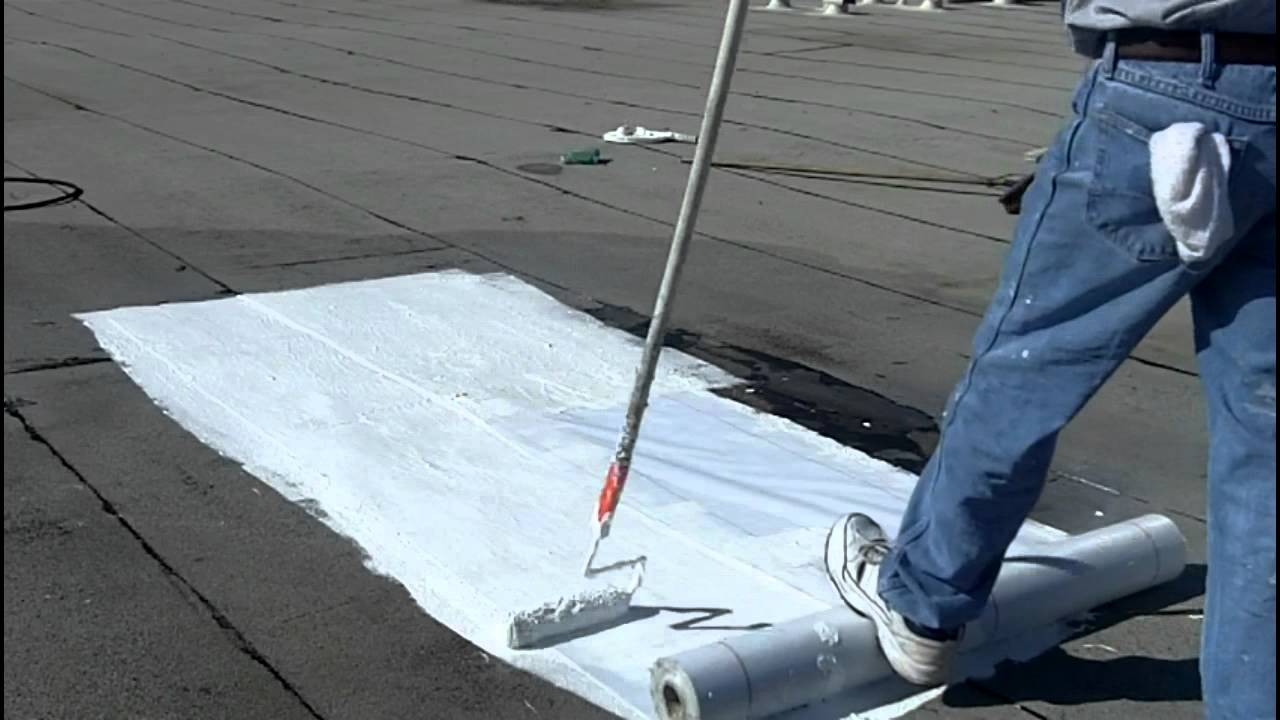
Hi everyone, I'm hoping someone can offer me some insightabout a month ago my darling partner, in an attempt to assist me, painted the roof of my horse trailer with the silver seal aluminum finishing. When he realized the covering was running down the sides, he got the intense idea to simply paint my entire (steel) trailer with it.
It's now a mahogany color. He likewise used a paint brush, so it's super streaky. Is there a method to remove this stuff? I have actually given him a month to repair it, however it's show season and I need my trailer back! Can I simply paint over it? The important things only cost me 3 grand, it doesn't have to be gorgeous, would just prefer for it to look a little better than if does currently! Any tips would be terrific! Thanks in advance!!! Sorry to be the bearer of problem but I do not know of a method to eliminate it.
I 'd state the finest bet would be to put numerous coats of white paint over it. Yes the un mixed aluminum coat may bleed through, so you paint it once again. There are some items that will get rid of the asphalt, however they are very corrosive and would make an outright mess.
 Butyl Elastomeric Roof Coating Explained
https://www.youtube.com/embed/CmKMTsIqRl4
Waterproofing the RV roof is among the most essential things to do. It can make a huge difference in between savings and losing money on major repair work. It is why Recreational Vehicle owners should apply a sealant to the roofing system frequently as a part of upkeep. Nevertheless, there are times when you require to take the old sealant off, and replace it with a new one.

Elastomeric Roof Coatings For Leaks Repair And Maintenace
May you like the Finest RV Roof Sealant Exhaust vents Obvious fractures Unsealed edges and corners Wirings going into the roofing Antennas Around the exhaust fans and air conditioning unit The procedure is basic. All you require to do is to In this approach, you don't need to use a chemical cleaner, however then, it might not apply throughout all roofing system sealants.
You shouldn't interrupt the Recreational Vehicle roofing to prevent a larger issue, such as damaging the other portions of the roofing system. In addition, some owners also use a hair drier in removing a rubber roofing sealant, which is rather useful and simple if you're handling cold weather condition. On the other hand, you can also describe the item handbook that features the sealant that you purchased.
A few of them advise using a putty knife that can get rid of the roofing sealant. Others can suggest using a heat weapon to take it out. You can think about any of these simple methods to eliminate the set and dried sealant, especially if you need to reapply the sealant or you have made a mistake.
Click To Read: http://rylanlwou045.xtgem.com/elastomeric%20roof%20coatings%20for%20leaks%20repair%20and%20maintenace
It can likewise seal around the edges and corners so that they stay watertight. Utilizing a sealant, you can likewise keep your Recreational Vehicle cool and dry on any weather. Nevertheless, you may in some cases need to eliminate the old rubber roof covering because you need to reapply a new one or remedy some application errors.
Jetcoat Cool King Reflective Acrylic Roof Coating, Waterproof
With it, you can apply a new one to continue enjoying its benefits, such as avoiding water damage, conserving cash and preventing big repairs. All these can also extend your RV's lifespan and promote the convenience of everyone aboard your vehicle.
 Kool Seal Elastomeric Roof Coating
( This post might consist of affiliate links. For more info visit our Personal privacy page.) My Recreational Vehicle roofing that requires to be replaced! Welcome to my RV Restoration Series!.?.!! So you desire a RV however can't manage one. If you resemble me and have more time than money, then possibly your best option is to buy an old Recreational Vehicle and fix it up.
All old RV's do! Time to consider an! I know, a RV roofing replacement can appear like an impossibly uphill struggle. I get it. I bought my Recreational Vehicle over a year earlier and didn't have the guts to begin tackling this job till today. But I'm here to inform you, if I can do it, you can do it.
It has just 55,000 miles and all the home appliances work and I love the layout. The catch? Water damage! I've never ever worked on a RV before and I need to confess, I'm afraid. I've done a lot of house remodeling and I'm still terrified. That's because this is all brand-new to me and I have no concept what to expect.
Karnak Coatings Surecoat-elastomeric-roof-coating
 Best Practices For Roof Coating Application
So my primary step (that I actually did lots of months back when I bought the camper) was making a shelter so I might work without rain putting in. I bought a 12 x 26 SuperMax Canopy by ShelterLogic (over $450 on Amazon however I purchased mine from Northern Tool for about $340!) and boosted the legs with wood extensions to make the canopy high enough that I might stand on the roofing and walk below it.
It appears like there are no canopies readily available that are high sufficient to function as a Recreational Vehicle carport. You could purchase a real metal roof Recreational Vehicle carport but those are way more pricey, typically $2000 and up! Also these do not typically have enough clearance above for you to deal with the roofing system.
I computed the cost of doing it that way (wood framing) and it came out to a similar price as buying this canopy. I figured I would rather have it semi-portable so I went with the canopy, plus this enables me to adjust the height up and down when I require to.
Ultimately those bent throughout a wind storm. Then I sawed 1 1/4 square legs from 24's to put inside the canopy legs (once again holding the canopy up with pipe clamps.) and enhancing the 4 corners with an extra 24 screwed to it. This is still a little floppy. I most likely must have forked out for some rigid steel pipeline from the start.
Cool King – 7-year White Reflective Elastomeric Roof Coating
Just be sure to stake the corners down with rope if you have any wind! I raised a 12 x 26 canopy to cover my work location. Time to climb up and take an appearance at some of the problem areas on my old EPDM roof. EPDM is the most common sort of rubber roofing found on campers.
Fractures in the EPDM roof at edge of camper. An old spot task on the Recreational Vehicle rubber roofing system. Loads of caulk stacked over old problem locations. As you can see, this roofing system has actually had a great deal of concerns throughout the years. Looking from the within the camper there have plainly been leaks in lots of areas of the roofing.
I got an energy knife and started slicing. The very first thing I discovered is that there were 2 layers. On the bottom is the initial EPDM rubber roof layer. I understand it's EPDM rubber and not TPO rubber due to the fact that of the black backing. (TPO roofing is white on both sides.) On top of my EPDM roofing is a thin Recreational Vehicle roofing finish that was used later.
I simply left the roofing system coating adhered to the EPDM roofing and pulled them up together. (You don't require to peel them up independently.) Beginning to peel off roofing covering. Peeling up section of the bottom layer of rubber. This reveals that the original Recreational Vehicle roof was EPDM because of the black backing.
How-to: Apply Cool Roof Coating
 30 Roof Coating Ideas
https://www.youtube.com/embed/DaZqiDpcvA4
I cut lines with an utility knife around components. All rubber roof eliminated from camper. This step went quite rapidly. There was an adhesive under the bottom layer of rubber that was still quite well stuck in many places, however with an excellent little force it peeled up easily.

Elastomeric Coatings For Metal Roofs
Browse Images Maps Play YouTube News Gmail Drive More Help Report a concern about Google Groups Keyboard shortcuts Sign in.
Chalking is a powdery residue on the roof surface area resulting from degradation of that material from direct exposure. It is NOT from settled dirt. Chalk must be eliminated by cleaning in order for the used coverings to have appropriate adhesion. The very best method to clean your roofing is to power-wash the surface area.
 Jetcoat Cool King Reflective Acrylic Roof Coating, Waterproof
We advise you scrub the roof with water and TSP (Trisodium Phosphate) option to eliminate all dirt, oils, grease and chalk. POINTER: Prior to finish begins, roof surface need to be contacted tape to see if it is actually clean. If the tape pulls off tight and uniformly, the surface is clean.
KEEP IN MIND: If no quantity of cleaning produces a sufficient tape pull, a primer needs to be thought about. The 3 M's Mildew, Moss and Mold, are usually fuzzy, greenish or bluish-grayish-white and THEY'RE ALIVE. Cement and tile roofing systems are specifically prone to mildew due to the fact that they include minerals which are needed to support growth.
Find More Info: https://www.openlearning.com/u/javier-qhqwhg/blog/ExpancelForElastomericCoolRoofCoatings/
To safeguard your roof, offer appropriate drainage and expose shaded areas to sunlight where possible. Susceptible locations that can not be corrected should be cleaned up with a chlorine bleach option twice each year. Tidy the roofing surface by power-washing or scrubbing with TSP (Trisodium Phosphate). Treat mildewed locations with a chlorine bleach solution.
Follow the Kool Seal simple 3-Step Process for the Moss: extremely little plants that grow in creamy, green clusters on moist surface areas. Mold: a downy or furry development on the roof surface caused by fungis, particularly in the existence of wetness or decay. Mildew: a fungus that can appear on a surface area when exposed to wetness, it looks like a thin, furry, whitish discoloration.
White-seal 100% Acrylic Elastomeric Reflective Roof
It is very important to seal your roofing as quickly as you see indications of alligatoring. If the surface area is left vulnerable, it can deteriorate beyond a point where a roof covering will work. Remove loose previous covering. Clean the roof with water and TSP (Trisodium Phosphate). Rinse completely and let dry.
Use to enhance patching cement on all fractures. If your roofing appears like this, see a roofing expert and have it changed. This is what occurs to asphalt if it's left exposed and unguarded. The very best method to prevent this from happening to your roof is to spot and reinforce all fractures with or.
Like Blister on your skin, blisters on a built-up roof (or BUR) occur when water gets trapped under the leading layers of the surface. With a bit of work you can eliminate this problem from your roofing system. If in doubt, consult a certified Roofing Specialist. Scrape off loose previous finishing.
Wash completely and let dry. On blistered locations, cut an X through the whole blister and allow moisture to vaporize and dry thoroughly before patching. Spot withor, the usage to strengthen patching cement over the blister and on all cracks. Top coat with a for the very best performance. Imagined left is a condition called loose lap.
With a little bit of work you can eliminate this problem from your roofing system. If in doubt, seek advice from a licensed Roofing Professional. Prepare the surface area per bundle directions. Safe and secure loose laps in place with, and then use to strengthen patching cement on all cracks. Top coat with a or for the very best efficiency.
This condition is called "fishmouthing". If left ignored, fishmouths may enable water penetration into the roof system. With a little work you can eliminate this issue from your roof. If in doubt, speak with a certified Roofing Specialist. If loose edges extend back only a couple of inches, the loose material might be snipped off and discarded.
Pro-q 7-year White Elastomeric Roof Coating
Trim flaps so they lie flat. Seal with and enhance with. Then leading coat the whole roof surface with a or for the finest performance.
Inspect your Lexis roof finishing system routinely. Keeping the roofing clean and free of debris will provide you optimal performance and longer service life. Retouch any damaged areas immediately to prevent substrate deterioration.
Hi everybody, I'm hoping somebody can offer me some insightabout a month ago my darling other half, in an attempt to assist me, painted the roof of my horse trailer with the silver seal aluminum covering. When he understood the coating was running down the sides, he got the brilliant concept to just paint my entire (steel) trailer with it.
It's now a mahogany color. He also used a paint brush, so it's extremely streaky. Is there a method to remove this stuff? I've given him a month to fix it, but it's program season and I require my trailer back! Can I simply paint over it? The thing only cost me 3 grand, it doesn't need to be beautiful, would just prefer for it to look a little much better than if does presently! Any recommendations would be excellent! Thanks in advance!!! Sorry to be the bearer of bad news but I do not know of a way to eliminate it.
I 'd state the very best bet would be to put multiple coats of white paint over it. Yes the un mixed aluminum coat may bleed through, so you paint it once again. There are some items that will eliminate the asphalt, however they are very corrosive and would make an absolute mess.
 10-year Premium White Elastomeric Roof Coating
https://www.youtube.com/embed/iXUcBdVnhwI
Waterproofing the Recreational Vehicle roof is one of the most essential things to do. It can make a big difference between cost savings and losing money on significant repair work. It is why RV owners need to apply a sealant to the roofing system regularly as a part of upkeep. Nevertheless, there are times when you require to take the old sealant off, and change it with a brand-new one.

Spraying Elastomerics And Roof Coatings – A Complete Guide
May you like the Finest Recreational Vehicle Roofing System Sealant Exhaust vents Visible cracks Unsealed edges and corners Wirings getting in the roofing Antennas Around the exhaust fans and a/c unit The process is simple. All you need to do is to In this approach, you do not have to utilize a chemical eliminator, but then, it might not apply across all roof sealants.
You should not interrupt the Recreational Vehicle roof to prevent a larger issue, such as damaging the other parts of the roofing. In addition, some owners likewise utilize a hair drier in removing a rubber roofing sealant, which is rather practical and easy if you're dealing with winter. On the other hand, you can likewise refer to the product manual that includes the sealant that you purchased.
Some of them advise utilizing a putty knife that can remove the roof sealant. Others can suggest using a heat gun to take it out. You can consider any of these basic approaches to get rid of the set and dried sealant, especially if you require to reapply the sealant or you have slipped up.
It can also seal around the edges and corners so that they stay leak-proof. Using a sealant, you can likewise keep your Recreational Vehicle cool and dry on any weather condition. Nevertheless, you might in some cases need to remove the old rubber roofing covering since you require to reapply a brand-new one or fix some application errors.
Elastomeric Roof Repair Coatings, Elastomeric Roof Coatings
With it, you can use a new one to continue reaping its advantages, such as preventing water damage, saving cash and avoiding big repairs. All these can also extend your RV's life-span and promote the comfort of everybody aboard your lorry.
10-year Premium White Elastomeric Roof Coating
( This post may include affiliate links. For more info see our Privacy page.) My Recreational Vehicle roof that requires to be changed! Welcome to my Recreational Vehicle Remodelling Series!.?.!! So you want a Recreational Vehicle but can't pay for one. If you resemble me and have more time than money, then perhaps your best choice is to purchase an old RV and repair it up.
All old Recreational Vehicle's do! Time to consider an! I know, a RV roofing system replacement can look like an impossibly uphill struggle. I get it. I bought my Recreational Vehicle over a year back and didn't have the guts to start tackling this task until today. However I'm here to inform you, if I can do it, you can do it.
It has just 55,000 miles and all the devices work and I enjoy the layout. The catch? Water damage! I have actually never ever dealt with a Recreational Vehicle before and I have to admit, I'm scared. I have actually done a lot of house remodeling and I'm still terrified. That's because this is all brand-new to me and I have no idea what to expect.
Elastomeric Rv White Roof Coating
 The Benefits Of Elastomeric Roof Coating
So my primary step (that I really did lots of months back when I bought the camper) was making a shelter so I might work without rain putting in. I bought a 12 x 26 SuperMax Canopy by ShelterLogic (over $450 on Amazon but I purchased mine from Northern Tool for about $340!) and jacked up the legs with wood extensions to make the canopy high enough that I could stand on the roofing system and walk beneath it.
It appears like there are no canopies available that are tall enough to work as a RV carport. You could buy a real metal roof RV carport but those are way more pricey, generally $2000 and up! Likewise these do not usually have sufficient clearance above for you to deal with the roofing.
I determined the expense of doing it that way (wood framing) and it came out to a similar rate as buying this canopy. I figured I would rather have it semi-portable so I opted for the canopy, plus this enables me to adjust the height up and down when I need to.
Eventually those bent throughout a wind storm. Then I sawed 1 1/4 square legs from 24's to put inside the canopy legs (again holding the canopy up with pipeline clamps.) and enhancing the 4 corners with an additional 24 screwed to it. This is still a little floppy. I most likely should have forked out for some stiff steel pipe from the start.
Pro-q 7-year White Elastomeric Roof Coating
Simply make certain to stake the corners down with rope if you have any wind! I raised a 12 x 26 canopy to cover my work area. Time to go up and take an appearance at a few of the issue areas on my old EPDM roofing. EPDM is the most common kind of rubber roofing found on campers.
Cracks in the EPDM roof at edge of camper. An old spot task on the RV rubber roof. Loads of caulk stacked over old issue locations. As you can see, this roofing system has actually had a lot of issues throughout the years. Looking from the within the camper there have clearly been leaks in numerous locations of the roof.
I grabbed an utility knife and began slicing. The first thing I discovered is that there were 2 layers. On the bottom is the original EPDM rubber roof layer. I understand it's EPDM rubber and not TPO rubber since of the black backing. (TPO roof is white on both sides.) On top of my EPDM roof is a thin Recreational Vehicle roof finishing that was applied later on.
I just left the roofing covering adhered to the EPDM roof and pulled them up together. (You don't need to peel them up individually.) Starting to remove roofing system finish. Peeling up area of the bottom layer of rubber. This reveals that the original Recreational Vehicle roof was EPDM since of the black backing.
Elastomeric Coating System Installation Guidelines
Kool Seal Elastomeric Roof Coating
https://www.youtube.com/embed/CmKMTsIqRl4
I cut lines with an energy knife around components. All rubber roofing gotten rid of from camper. This step went pretty rapidly. There was an adhesive under the bottom layer of rubber that was still pretty well stuck in numerous places, however with an excellent little bit of force it peeled up easily.

Kool Seal White Elastomeric Roof Coating
Browse Images Maps Play YouTube News Gmail Drive More Help Report a concern about Google Groups Keyboard faster ways Sign in.
Chalking is a powdery residue on the roof surface resulting from deterioration of that product from exposure. It is NOT from settled dirt. Chalk needs to be gotten rid of by cleaning in order for the used finishings to have correct adhesion. The very best way to clean your roof is to power-wash the surface.
Elastomeric Coatings For Metal Roofs
We advise you scrub the roof with water and TSP (Trisodium Phosphate) service to remove all dirt, oils, grease and chalk. POINTER: Prior to covering begins, roofing system surface must be talked to tape to see if it is actually clean. If the tape pulls off tight and equally, the surface area is tidy.
NOTE: If no quantity of cleansing produces a sufficient tape pull, a guide should be thought about. The three M's Mildew, Moss and Mold, are normally fuzzy, greenish or bluish-grayish-white and THEY'RE ALIVE. Cement and tile roofs are especially vulnerable to mildew since they include minerals which are required to support growth.
Content: roof repair companies https://cruzheru446.edublogs.org/2021/01/08/roof-sealants-coating-at-ace-hardware/
To protect your roofing, supply proper drainage and expose shaded locations to sunlight where possible. Vulnerable areas that can not be corrected ought to be cleaned with a chlorine bleach option twice each year. Clean the roofing system surface area by power-washing or scrubbing with TSP (Trisodium Phosphate). Treat mildewed areas with a chlorine bleach service.
Follow the Kool Seal simple 3-Step Process for the Moss: extremely small plants that grow in silky, green clusters on damp surface areas. Mold: a downy or furry development on the roof surface caused by fungi, specifically in the presence of dampness or decay. Mildew: a fungi that can appear on a surface when exposed to wetness, it appears as a thin, furry, whitish staining.
Myths, Facts, And The Truth About Silicone And Elastomeric Roof Coatings
It is essential to seal your roof as quickly as you see indications of alligatoring. If the surface is left unprotected, it can weaken beyond a point where a roof covering will work. Remove loose previous finishing. Clean the roofing with water and TSP (Trisodium Phosphate). Rinse completely and let dry.
Use to strengthen patching cement on all cracks. If your roofing looks like this, see a roofing expert and have it replaced. This is what happens to asphalt if it's left exposed and vulnerable. The very best way to prevent this from taking place to your roofing is to patch and reinforce all cracks with or.
Like Blister on your skin, blisters on a built-up roof (or BUR) occur when water gets trapped under the top layers of the surface area. With a bit of work you can remove this problem from your roofing system. If in doubt, consult a certified Roof Professional. Scrape off loose previous covering.
Rinse thoroughly and let dry. On blistered areas, cut an X through the entire blister and permit wetness to evaporate and dry completely prior to patching. Spot withor, the usage to reinforce patching cement over the blister and on all cracks. Leading coat with a for the very best efficiency. Imagined left is a condition called loose lap.
With a little bit of work you can eliminate this problem from your roofing system. If in doubt, speak with a qualified Roofing Professional. Prepare the surface per plan instructions. Safe and secure loose laps in location with, and after that utilize to strengthen patching cement on all fractures. Leading coat with a or for the very best performance.
This condition is referred to as "fishmouthing". If left unattended, fishmouths might permit water penetration into the roofing system. With a bit of work you can eliminate this issue from your roof. If in doubt, speak with a certified Roof Professional. If loose edges extend back only a number of inches, the loose product might be snipped off and discarded.
Elastomeric Roof Coating On Wood?
Trim flaps so they lie flat. Seal with and enhance with. Then leading coat the whole roofing system surface with a or for the very best performance.
Check your Lexis roofing coating system frequently. Keeping the roof tidy and devoid of particles will provide you maximum performance and longer life span. Touch up any harmed areas instantly to prevent substrate degeneration.
Hi everybody, I'm hoping someone can offer me some insightabout a month ago my darling hubby, in an attempt to assist me, painted the roofing system of my horse trailer with the silver seal aluminum coating. When he realized the finishing was diminishing the sides, he got the brilliant idea to simply paint my whole (steel) trailer with it.
It's now a mahogany color. He also utilized a paint brush, so it's very streaky. Is there a way to eliminate this things? I have actually provided him a month to fix it, however it's program season and I require my trailer back! Can I just paint over it? The important things just cost me 3 grand, it doesn't need to be beautiful, would just choose for it to look a little better than if does presently! Any ideas would be fantastic! Thanks in advance!!! Sorry to be the bearer of bad news but I don't understand of a way to eliminate it.
I 'd state the best bet would be to put several coats of white paint over it. Yes the un mixed aluminum coat may bleed through, so you paint it again. There are some items that will remove the asphalt, however they are very corrosive and would make an absolute mess.
 Kool Seal White Elastomeric Roof Coating
https://www.youtube.com/embed/fFF3EsaYtvk
Waterproofing the Recreational Vehicle roof is among the most crucial things to do. It can make a big difference in between savings and losing cash on significant repair work. It is why Recreational Vehicle owners need to apply a sealant to the roof frequently as a part of maintenance. However, there are times when you require to take the old sealant off, and change it with a brand-new one.

Expancel For Elastomeric Cool Roof Coatings
How To Apply A Roof Sealant
If you think you'll be conserving the roofing decking plywood (not changing it), then you might save yourself some cleanup trouble by getting rid of the fixtures initially and then peeling up the rubber! Information of water damage on camper roofing. More water harmed areas on RV roofing decking. There was nothing actually dreadful that made me feel like I was going to fail, however definitely a great deal of damage and I was getting the sensation I would be changing a lot of the roofing decking plywood.
 Consider An Elastomeric Roof Coating
More Help: roof repair companies https://cruzheru446.edublogs.org/2021/01/08/roof-sealants-coating-at-ace-hardware/
I chose the most basic one first, a vent cap from a cooking area sink plumbing vent pipeline. Starting to scrape caulk and sealant. I used a stiff scraper with a chisel-like blade and simply started spying and chipping and scraping and hacking. There is no other way around this, you simply have to begin digging till you expose the screw heads.
Loosening the screws in vent cap. The screws on this vent cap were hex-head metal screws so I used a small socket driver to eliminate them. Some came out tidy. Others were rusted and I needed to use a vice-grip pliers to get the heads and turn them bit by bit.
I discovered an old wasp nest inside the vent cover. This is a sight I'll probably have to get utilized to, finding the remains of animal habitation in every nook and cranny. I spend an awful great deal of my time developing excellent wildlife habitat in my yard so I don't get upset when an animal picks to set up house in my RV.
Best Practices For Roof Coating Application
Fortunately nobody was home in this old nest so I just tossed it. Possibly I'll put a screen over it when changing it. Which brings us to the next point. You should try not to harm these pieces (like vent covers and caps) as you're scraping off the old caulk and sealant just in case you require to use them again.
(Guess I'll find out when the roofing system is done!) Prying up the vent cap and getting rid of the last ring of rubber roof beneath. So I pried up the rest of the cap and scraped up the staying rubber roofing and butyl tape and putty and 25 years of other gunk and here's how it looks tidied up.
 Foam Roofing Advantages: The Benefits Of Elastomeric Roof Coating
One down, 7 more fixtures to go. Next I chose to take on the only roof ventilation fan that my camper has. My roof vent likewise had a vent cover over it. So I started scraping the gunk from those screws. Starting on the roof vent. Hardware exposed on roofing system vent cap, the very first nut came off clean.
 Adhesion Is Important When Applying An Elastomeric Roof
Bolt is spinning. The fasteners on this Recreational Vehicle roofing vent cover were nuts on small bolts. The first one came off great with an extension socket package. The second one just started spinning, meaning the bolt was not repaired in location however turning together with the nut. Downer. A peek at the hardware holding down the roofing vent cover.
How To Apply An Elastomeric Roof Coating System For Diyers
I didn't have any great method to hold the bolt in place so rather I chose to saw through the bolts with a reciprocating saw. Sawing through bolts on roofing system vent cover. I utilized a cordless reciprocating saw with a metal-cutting blade but it was difficult to get the blade flat enough to reach the bolts so near to the roofing system deck. A lot of were so old and rusted that they sheared off when I unscrewed then with a lot of force. Unscrewing the brackets that held the vent cover in location. Then I scraped more caulk and roof sealant off the flange of the roofing vent itself. I soon discovered there disappeared screws or hardware holding it down so I quit on the scraping and went inside the RV After scraping the caulk and sealant from flange of roofing system vent, say goodbye to screws! Loosening the inside cover plate of roofing system vent fan in Recreational Vehicle bathroom.
A couple sheared off with a great deal of force, however two would not budge. So I needed to drill out the screw heads. I selected a drill bit close to the size of the shaft of the screws that I had actually currently pulled out and began drilling. Picking a drill bit for drilling out a screw head.
Shatterproof glass advised. So I drilled out the heads, one popped off and the other I was getting irritated with and gave it a pull before it was drilled through. Rather of popping off the screw head, the plastic just dissolved around the hot screw head. Whoops. Hope I don't have to reuse this cover.
If not, I'll require broader screw heads when re-assembling. Cover plate gotten rid of from roof vent. Next I discovered little corner brackets with hex-head bolts holding them in. I unscrewed them (all came out fine luckily) and pulled out the brackets and little white plastic spacers. Loosening corner brackets in roof vent.
Elastomeric Acrylic Coatings Application Handbook
https://www.youtube.com/embed/I5Fyceu7Qyg
All corner brackets removed, ready to take out. Once the brackets were out I went back up leading to pry out the the roof vent. Then I scraped up all the staying gunk and rubber roofing. Taking off the old roof vent. There are 2 wires running to the roofing vent (a black hot wire and a white neutral wire) that you'll need to clip to get rid of the old vent.

Myths, Facts, And The Truth About Silicone And Elastomeric Roof Coatings
Search Images Maps Play YouTube News Gmail Drive More Help Report an issue about Google Groups Keyboard faster ways Sign in.
Chalking is a powdery residue on the roofing system surface arising from destruction of that product from exposure. It is NOT from settled dirt. Chalk must be gotten rid of by cleaning in order for the used finishings to have correct adhesion. The best method to clean your roofing system is to power-wash the surface.
 Jetcoat Cool King Reflective Acrylic Roof Coating, Waterproof
We suggest you scrub the roofing with water and TSP (Trisodium Phosphate) option to remove all dirt, oils, grease and chalk. POINTER: Before finishing begins, roofing system surface area must be checked with tape to see if it is truly clean. If the tape pulls off tight and uniformly, the surface is clean.
NOTE: If no amount of cleaning produces an adequate tape pull, a guide should be considered. The 3 M's Mildew, Moss and Mold, are usually fuzzy, greenish or bluish-grayish-white and THEY'RE ALIVE. Cement and tile roofings are specifically prone to mildew because they consist of minerals which are required to support growth.
More Info: roof repair companies https://cruzheru446.edublogs.org/2021/01/08/roof-sealants-coating-at-ace-hardware/
To secure your roofing, provide correct drain and expose shaded areas to sunlight where possible. Prone locations that can not be corrected need to be cleaned up with a chlorine bleach solution two times each year. Tidy the roofing surface by power-washing or scrubbing with TSP (Trisodium Phosphate). Treat mildewed areas with a chlorine bleach solution.
Follow the Kool Seal simple 3-Step Process for the Moss: very small plants that grow in creamy, green clusters on moist surface areas. Mold: a downy or furry development on the roofing system surface area triggered by fungis, particularly in the presence of moisture or decay. Mildew: a fungi that can appear on a surface area when exposed to moisture, it looks like a thin, furry, whitish staining.
Technical Data Sheet Elastomeric Roof Coating
It is important to seal your roofing system as quickly as you see signs of alligatoring. If the surface area is left unprotected, it can degrade beyond a point where a roofing system coating will work. Scrape off loose previous finishing. Tidy the roofing system with water and TSP (Trisodium Phosphate). Rinse completely and let dry.
Use to strengthen patching cement on all cracks. If your roofing looks like this, see a roofing expert and have it replaced. This is what happens to asphalt if it's left exposed and unguarded. The very best way to avoid this from taking place to your roof is to patch and reinforce all cracks with or.
Like Blister on your skin, blisters on a built-up roofing system (or BUR) occur when water gets caught under the top layers of the surface area. With a little work you can eliminate this problem from your roofing system. If in doubt, seek advice from a certified Roofing Specialist. Scrape off loose previous finish.
Wash completely and let dry. On blistered locations, cut an X through the entire blister and allow moisture to evaporate and dry thoroughly prior to patching. Patch withor, the usage to strengthen patching cement over the blister and on all fractures. Top coat with a for the best efficiency. Imagined left is a condition called loose lap.
With a little work you can remove this problem from your roofing system. If in doubt, seek advice from a qualified Roofing Expert. Prepare the surface per plan instructions. Protected loose laps in location with, and then use to enhance patching cement on all cracks. Leading coat with a or for the finest efficiency.
This condition is known as "fishmouthing". If left unattended, fishmouths might enable water penetration into the roof. With a bit of work you can remove this issue from your roof. If in doubt, seek advice from a licensed Roofing Professional. If loose edges extend back just a couple of inches, the loose product might be snipped off and discarded.
The Ultimate Guide To Rv Roof Coating
Trim flaps so they lie flat. Seal with and enhance with. Then leading coat the entire roofing surface with a or for the best efficiency.
Check your Lexis roofing system coating system regularly. Keeping the roofing clean and devoid of debris will offer you maximum performance and longer service life. Touch up any harmed locations immediately to prevent substrate degeneration.
Hi everyone, I'm hoping someone can give me some insightabout a month ago my darling other half, in an effort to help me, painted the roofing system of my horse trailer with the silver seal aluminum covering. When he recognized the finishing was running down the sides, he got the brilliant idea to just paint my whole (steel) trailer with it.
It's now a mahogany color. He likewise utilized a paint brush, so it's very streaky. Exists a method to eliminate this stuff? I've offered him a month to repair it, however it's show season and I need my trailer back! Can I just paint over it? The important things just cost me 3 grand, it doesn't need to be stunning, would just choose for it to look a little better than if does currently! Any recommendations would be fantastic! Thanks in advance!!! Sorry to be the bearer of problem but I do not know of a method to eliminate it.
I 'd say the very best bet would be to put numerous coats of white paint over it. Yes the un combined aluminum coat may bleed through, so you paint it once again. There are some items that will get rid of the asphalt, however they are extremely destructive and would make an absolute mess.
 Expancel For Elastomeric Cool Roof Coatings
https://www.youtube.com/embed/fFF3EsaYtvk
Waterproofing the RV roofing system is one of the most important things to do. It can make a big distinction between savings and losing money on major repairs. It is why Recreational Vehicle owners must apply a sealant to the roofing system frequently as a part of upkeep. However, there are times when you require to take the old sealant off, and replace it with a new one.

Tips For Applying Your Elastomeric Roof Coating
 Quick Setting Elastomeric Roof Coating
If you think you'll be saving the roofing decking plywood (not changing it), then you may save yourself some clean-up problem by removing the components initially and then peeling up the rubber! Information of water damage on camper roof. More water damaged areas on RV roof decking. There was nothing truly terrible that made me seem like I was going to fail, however absolutely a great deal of damage and I was getting the sensation I would be replacing a lot of the roof decking plywood.
 Expancel For Elastomeric Cool Roof Coatings
Redirected Here: roof repair companies https://cruzheru446.edublogs.org/2021/01/08/roof-sealants-coating-at-ace-hardware/
I opted for the simplest one first, a vent cap from a cooking area sink pipes vent pipe. Beginning to scrape caulk and sealant. I used a stiff scraper with a chisel-like blade and simply started prying and chipping and scraping and hacking. There is no other method around this, you just need to start digging till you expose the screw heads.
Loosening the screws in vent cap. The screws on this vent cap were hex-head metal screws so I utilized a little socket driver to eliminate them. Some came out clean. Others were rusted and I needed to use a vice-grip pliers to get the heads and turn them bit by bit.
I found an old wasp nest inside the vent cover. This is a sight I'll most likely have to get used to, finding the remains of animal habitation in every nook and cranny. I invest a horrible lot of my time developing great wildlife habitat in my yard so I don't get offended when an animal chooses to set up home in my Recreational Vehicle.
How To Apply An Elastomeric Roof Coating System For Diyers
Thankfully no one was home in this old nest so I just tossed it. Possibly I'll put a screen over it when changing it. Which brings us to the next point. You must try not to harm these pieces (like vent covers and caps) as you're scraping off the old caulk and sealant just in case you need to utilize them once again.
(Think I'll discover out when the roof is done!) Prying up the vent cap and removing the last ring of rubber roof underneath. So I pried up the rest of the cap and scraped up the staying rubber roofing and butyl tape and putty and 25 years of other gunk and here's how it looks cleaned up.
Consider An Elastomeric Roof Coating
One down, 7 more fixtures to go. Next I chose to deal with the only roofing system ventilation fan that my camper has. My roof vent also had a vent cover over it. So I started scraping the gunk from those screws. Beginning on the roofing vent. Hardware exposed on roof vent cap, the very first nut came off clean.
 Elastomeric Roof Coating
Bolt is spinning. The fasteners on this Recreational Vehicle roofing vent cover were nuts on little bolts. The first one came off great with an extension socket set. The 2nd one simply started spinning, suggesting the bolt was not repaired in location however turning in addition to the nut. Bummer. A peek at the hardware holding down the roof vent cover.
White-seal 100% Acrylic Elastomeric Reflective Roof
I didn't have any excellent way to hold the bolt in location so instead I chose to saw through the bolts with a reciprocating saw. Sawing through bolts on roofing system vent cover. I utilized a cordless reciprocating saw with a metal-cutting blade but it was difficult to get the blade flat adequate to reach the bolts so near to the roof deck. A lot of were so old and rusted that they sheared off when I loosened then with a great deal of force. Unscrewing the brackets that held the vent cover in place. Then I scraped more caulk and roof sealant off the flange of the roofing vent itself. I soon found there disappeared screws or hardware holding it down so I gave up on the scraping and went inside the RV After scraping the caulk and sealant from flange of roofing vent, say goodbye to screws! Loosening the within cover plate of roof vent fan in RV bathroom.
A couple sheared off with a great deal of force, however 2 wouldn't budge. So I had to drill out the screw heads. I selected a drill bit near to the size of the shaft of the screws that I had actually currently pulled out and began drilling. Choosing a drill bit for drilling out a screw head.
Shatterproof glass advised. So I drilled out the heads, one popped off and the other I was getting upset with and offered it a pull prior to it was drilled through. Rather of popping off the screw head, the plastic just melted away around the hot screw head. Whoops. Hope I do not have to recycle this cover.
If not, I'll require broader screw heads when re-assembling. Cover plate eliminated from roofing system vent. Next I discovered little corner brackets with hex-head bolts holding them in. I loosened them (all came out great luckily) and pulled out the brackets and little white plastic spacers. Unscrewing corner brackets in roof vent.
The Benefits Of Elastomeric Roof Coating
https://www.youtube.com/embed/Jgqe6vL_-Jo
All corner brackets got rid of, ready to take out. When the brackets were out I went back up top to pry out the the roofing system vent. Then I scraped up all the staying gunk and rubber roof. Taking off the old roof vent. There are two wires going to the roofing vent (a black hot wire and a white neutral wire) that you'll require to clip to eliminate the old vent.

Jetcoat Cool King Reflective Acrylic Roof Coating, Waterproof
Roof Coat Elastomeric Coating Product Data Sheet
If you think you'll be saving the roofing system decking plywood (not changing it), then you may conserve yourself some cleanup trouble by eliminating the components first and after that peeling up the rubber! Detail of water damage on camper roofing. More water damaged locations on Recreational Vehicle roof decking. There was absolutely nothing really horrible that made me seem like I was going to fall through, however definitely a lot of damage and I was getting the feeling I would be changing a great deal of the roofing system decking plywood.
Tips For Specifying And Applying Elastomeric Coatings
Content: how much does it cost to repair roof leak http://andreszohf173.bravesites.com/entries/general/how-to-choose-the-best-elastomeric-roof-coating
I chose the easiest one first, a vent cap from a cooking area sink pipes vent pipeline. Starting to scrape caulk and sealant. I used a stiff scraper with a chisel-like blade and just began prying and breaking and scraping and hacking. There is no other way around this, you simply need to start digging up until you expose the screw heads.
Loosening the screws in vent cap. The screws on this vent cap were hex-head metal screws so I used a small socket motorist to remove them. Some came out tidy. Others were rusted and I had to utilize a vice-grip pliers to grab the heads and turn them little bit by little.
I found an old wasp nest inside the vent cover. This is a sight I'll probably have to get utilized to, discovering the remains of animal habitation in every nook and cranny. I invest a horrible lot of my time creating good wildlife habitat in my backyard so I do not get offended when a creature chooses to set up home in my Recreational Vehicle.
30 Roof Coating Ideas
Luckily nobody was home in this old nest so I just tossed it. Maybe I'll put a screen over it when replacing it. Which brings us to the next point. You must try not to damage these pieces (like vent covers and caps) as you're scraping off the old caulk and sealant simply in case you require to use them again.
(Think I'll find out when the roofing is done!) Prying up the vent cap and eliminating the last ring of rubber roof underneath. So I pried up the rest of the cap and scraped up the remaining rubber roofing and butyl tape and putty and 25 years of other gunk and here's how it looks cleaned up.
10-year Premium White Elastomeric Roof Coating
One down, 7 more fixtures to go. Next I decided to tackle the only roofing ventilation fan that my camper has. My roof vent also had a vent cover over it. So I started scraping the gunk from those screws. Beginning on the roof vent. Hardware exposed on roofing vent cap, the very first nut came off clean.
 Elastomeric Roof Coating - Can You Apply It Yourself?
Bolt is spinning. The fasteners on this Recreational Vehicle roofing vent cover were nuts on small bolts. The first one came off great with an extension socket kit. The second one simply started spinning, suggesting the bolt was not fixed in place however turning together with the nut. Bummer. A peek at the hardware holding down the roofing vent cover.
Elastomeric Roof Coating
I didn't have any excellent way to hold the bolt in location so instead I opted to saw through the bolts with a reciprocating saw. Sawing through bolts on roof vent cover. I used a cordless reciprocating saw with a metal-cutting blade but it was difficult to get the blade flat sufficient to reach the bolts so near the roof deck. Most were so old and rusted that they sheared off when I unscrewed then with a great deal of force. Loosening the brackets that held the vent cover in place. Then I scraped more caulk and roof sealant off the flange of the roofing vent itself. I quickly discovered there disappeared screws or hardware holding it down so I provided up on the scraping and went inside the RV After scraping the caulk and sealant from flange of roofing system vent, say goodbye to screws! Unscrewing the within cover plate of roof vent fan in Recreational Vehicle bathroom.
A couple sheared off with a lot of force, but 2 wouldn't budge. So I had to drill out the screw heads. I selected a drill bit near the size of the shaft of the screws that I had already pulled out and started drilling. Choosing a drill bit for drilling out a screw head.
Shatterproof glass recommended. So I drilled out the heads, one popped off and the other I was getting annoyed with and offered it a yank prior to it was drilled through. Rather of popping off the screw head, the plastic simply melted away around the hot screw head. Whoops. Hope I do not need to recycle this cover.
If not, I'll require broader screw heads when re-assembling. Cover plate gotten rid of from roofing system vent. Next I found little corner brackets with hex-head bolts holding them in. I unscrewed them (all came out great luckily) and pulled out the brackets and little white plastic spacers. Loosening corner brackets in roofing system vent.
Instruction Tips – Black Jack Coatings
https://www.youtube.com/embed/S7EJlw_ql_Q
All corner brackets got rid of, ready to pull out. When the brackets were out I went back up leading to pry out the the roof vent. Then I scraped up all the remaining gunk and rubber roof. Raising off the old roof vent. There are two wires going to the roof vent (a black hot wire and a white neutral wire) that you'll require to clip to get rid of the old vent.

Technical Data Sheet Elastomeric Roof Coating
 White Elastomeric Roof Coating - Understand The Basics
If you believe you'll be conserving the roofing decking plywood (not replacing it), then you might save yourself some cleanup problem by eliminating the components first and after that peeling up the rubber! Detail of water damage on camper roof. More water harmed locations on Recreational Vehicle roofing system decking. There was nothing really terrible that made me feel like I was going to fail, but definitely a lot of damage and I was getting the feeling I would be changing a lot of the roofing system decking plywood.
 Spraying Elastomerics And Roof Coatings – A Complete Guide
Additional Reading: Tucson roof repair - DCRoofingArizona.com http://kylerrfiw359.bearsfanteamshop.com/tips-for-applying-your-elastomeric-roof-coating
I went for the easiest one first, a vent cap from a cooking area sink plumbing vent pipeline. Beginning to scrape caulk and sealant. I utilized a stiff scraper with a chisel-like blade and just began prying and cracking and scraping and hacking. There is no other way around this, you just have to begin digging until you expose the screw heads.
Loosening the screws in vent cap. The screws on this vent cap were hex-head metal screws so I used a little socket chauffeur to eliminate them. Some came out clean. Others were rusted and I needed to use a vice-grip pliers to get the heads and turn them gradually.
I discovered an old wasp nest inside the vent cover. This is a sight I'll probably need to get utilized to, finding the remains of animal habitation in every nook and cranny. I invest an awful lot of my time creating good wildlife environment in my backyard so I do not get angered when an animal selects to set up home in my RV.
How To Apply An Elastomeric Roof Coating System For Diyers
Thankfully nobody was home in this old nest so I simply tossed it. Perhaps I'll put a screen over it when changing it. Which brings us to the next point. You should try not to damage these pieces (like vent covers and caps) as you're scraping off the old caulk and sealant simply in case you require to use them again.
(Guess I'll discover out when the roofing is done!) Prying up the vent cap and eliminating the last ring of rubber roofing beneath. So I pried up the remainder of the cap and scraped up the staying rubber roofing system and butyl tape and putty and 25 years of other gunk and here's how it looks tidied up.
 How To Apply Roof Coating
One down, 7 more fixtures to go. Next I decided to deal with the only roofing system ventilation fan that my camper has. My roofing vent also had a vent cover over it. So I began scraping the gunk from those screws. Beginning on the roofing system vent. Hardware exposed on roofing system vent cap, the first nut came off tidy.
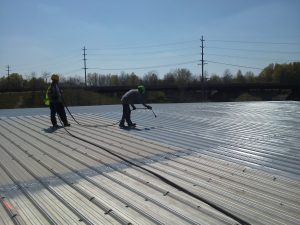 Roof Coating Specialists
Bolt is spinning. The fasteners on this Recreational Vehicle roof vent cover were nuts on little bolts. The very first one came off fine with an extension socket package. The second one just began spinning, meaning the bolt was not fixed in place but turning together with the nut. Bummer. A peek at the hardware holding down the roof vent cover.
How To Apply A Roof Sealant
I didn't have any great method to hold the bolt in location so instead I opted to saw through the bolts with a reciprocating saw. Sawing through bolts on roof vent cover. I utilized a cordless reciprocating saw with a metal-cutting blade but it was difficult to get the blade flat enough to reach the bolts so close to the roofing deck. Most were so old and rusted that they sheared off when I loosened then with a lot of force. Loosening the brackets that held the vent cover in location. Then I scraped more caulk and roofing system sealant off the flange of the roofing system vent itself. I quickly found there were no more screws or hardware holding it down so I quit on the scraping and went inside the Recreational Vehicle After scraping the caulk and sealant from flange of roofing system vent, no more screws! Unscrewing the inside cover plate of roofing system vent fan in Recreational Vehicle restroom.
A couple sheared off with a lot of force, but two would not budge. So I had to drill out the screw heads. I selected a drill bit near to the size of the shaft of the screws that I had actually currently taken out and started drilling. Selecting a drill bit for drilling out a screw head.
Security glasses advised. So I drilled out the heads, one popped off and the other I was getting irritated with and offered it a yank before it was drilled through. Rather of popping off the screw head, the plastic just dissolved around the hot screw head. Whoops. Hope I do not have to recycle this cover.
If not, I'll require larger screw heads when re-assembling. Cover plate eliminated from roofing vent. Next I discovered little corner brackets with hex-head bolts holding them in. I loosened them (all came out fine fortunately) and pulled out the brackets and little white plastic spacers. Loosening corner brackets in roof vent.
Flat Roof Coatings
https://www.youtube.com/embed/VBQnGfzMXwY
All corner brackets got rid of, ready to take out. Once the brackets were out I returned up leading to pry out the the roofing system vent. Then I scraped up all the staying gunk and rubber roof. Taking off the old roof vent. There are two wires going to the roofing system vent (a black hot wire and a white neutral wire) that you'll need to clip to remove the old vent.

Butyl Elastomeric Roof Coating Explained
May you like the Finest Recreational Vehicle Roof Sealant Exhaust vents Visible fractures Unsealed edges and corners Wirings going into the roofing system Antennas Around the exhaust fans and ac system The procedure is easy. All you need to do is to In this approach, you don't need to utilize a chemical eliminator, but then, it may not use across all roof sealants.
You should not disturb the Recreational Vehicle roof to avoid a bigger issue, such as damaging the other portions of the roofing system. In addition, some owners likewise utilize a hair drier in removing a rubber roof sealant, which is quite practical and easy if you're handling cold weather condition. On the other hand, you can also refer to the item manual that features the sealant that you bought.
Some of them suggest utilizing a putty knife that can get rid of the roofing sealant. Others can suggest using a heat gun to take it out. You can think about any of these basic techniques to get rid of the set and dried sealant, specifically if you require to reapply the sealant or you have actually made a mistake.
Useful Link: how much does it cost to repair roof leak http://andreszohf173.bravesites.com/entries/general/how-to-choose-the-best-elastomeric-roof-coating
It can likewise seal around the edges and corners so that they remain water tight. Utilizing a sealant, you can likewise keep your Recreational Vehicle cool and dry on any weather condition. Nevertheless, you may sometimes need to eliminate the old rubber roofing system finishing since you need to reapply a new one or correct some application mistakes.
Elastomeric Roof Coating - Can You Apply It Yourself?
With it, you can apply a new one to continue gaining its advantages, such as preventing water damage, conserving cash and avoiding substantial repairs. All these can likewise extend your Recreational Vehicle's life-span and promote the comfort of everybody aboard your automobile.
 How To Apply An Elastomeric Roof Coating System For Diyers
( This post may include affiliate links. For more info go to our Personal privacy page.) My Recreational Vehicle roofing that needs to be changed! Invite to my RV Renovation Series!.?.!! So you desire a Recreational Vehicle but can't afford one. If you're like me and have more time than cash, then perhaps your finest option is to purchase an old RV and repair it up.
All old Recreational Vehicle's do! Time to consider an! I understand, a RV roofing system replacement can look like an impossibly uphill struggle. I get it. I bought my RV over a year back and didn't have the guts to begin tackling this task till today. But I'm here to tell you, if I can do it, you can do it.
It has just 55,000 miles and all the devices work and I enjoy the layout. The catch? Water damage! I have actually never worked on a Recreational Vehicle before and I have to confess, I'm frightened. I've done a great deal of house remodeling and I'm still terrified. That's because this is all new to me and I have no concept what to anticipate.
Elastomeric Roof Repair Coatings, Elastomeric Roof Coatings
 Karnak Coatings Surecoat-elastomeric-roof-coating
So my very first step (that I in fact did lots of months ago when I bought the camper) was making a shelter so I could work without rain gathering. I bought a 12 x 26 SuperMax Canopy by ShelterLogic (over $450 on Amazon however I purchased mine from Northern Tool for about $340!) and boosted the legs with wood extensions to make the canopy high enough that I could base on the roofing system and walk underneath it.
It appears like there are no canopies available that are high adequate to work as a RV carport. You could buy a real metal roofing Recreational Vehicle carport but those are way more pricey, normally $2000 and up! Also these do not generally have adequate clearance above for you to deal with the roof.
I determined the cost of doing it that way (wood framing) and it came out to a comparable cost as purchasing this canopy. I figured I would rather have it semi-portable so I opted for the canopy, plus this allows me to adjust the height up and down when I need to.
Eventually those bent during a wind storm. Then I sawed 1 1/4 square legs from 24's to put inside the canopy legs (once again holding the canopy up with pipeline clamps.) and enhancing the four corners with an extra 24 screwed to it. This is still a little floppy. I most likely ought to have forked out for some stiff steel pipeline from the start.
How To Apply Elastomeric Paint (With Pictures)
Just make certain to stake the corners down with rope if you have any wind! I raised a 12 x 26 canopy to cover my work location. Time to climb and take a look at a few of the issue locations on my old EPDM roof. EPDM is the most typical sort of rubber roofing found on campers.
Fractures in the EPDM roof at edge of camper. An old patch task on the RV rubber roofing system. Loads of caulk stacked over old problem locations. As you can see, this roof has actually had a lot of problems throughout the years. Looking from the inside of the camper there have actually plainly been leaks in many locations of the roof.
I got an utility knife and started slicing. The first thing I observed is that there were two layers. On the bottom is the original EPDM rubber roofing system layer. I understand it's EPDM rubber and not TPO rubber since of the black backing. (TPO roofing is white on both sides.) On top of my EPDM roofing is a thin RV roofing system finish that was applied later on.
I simply left the roofing system finish stuck to the EPDM roofing and pulled them up together. (You don't require to peel them up individually.) Starting to peel off roofing finish. Peeling up area of the bottom layer of rubber. This shows that the original RV roof was EPDM because of the black support.
Instruction Tips – Black Jack Coatings
A Coatings Specialist Explains How To Correctly Apply Roof Coating
https://www.youtube.com/embed/oXIQ7SbBVtU
I cut lines with an utility knife around components. All rubber roof eliminated from camper. This action went pretty quickly. There was an adhesive under the bottom layer of rubber that was still pretty well stuck in many places, but with a good little force it peeled up easily.

Elastomeric Roof Coating - Can You Apply It Yourself?
Browse Images Maps Play YouTube News Gmail Drive More Assist Report a problem about Google Groups Keyboard faster ways Indication in.
Chalking is a powdery residue on the roof surface arising from deterioration of that material from direct exposure. It is NOT from settled dirt. Chalk needs to be removed by cleansing in order for the used finishes to have appropriate adhesion. The very best way to clean your roofing is to power-wash the surface area.
Roof Coat Elastomeric Coating Product Data Sheet
We advise you scrub the roofing with water and TSP (Trisodium Phosphate) option to get rid of all dirt, oils, grease and chalk. TIP: Prior to covering begins, roofing system surface must be inspected with tape to see if it is truly tidy. If the tape manages tight and uniformly, the surface is tidy.
KEEP IN MIND: If no amount of cleansing produces an appropriate tape pull, a guide ought to be thought about. The 3 M's Mildew, Moss and Mold, are normally fuzzy, greenish or bluish-grayish-white and THEY'RE ALIVE. Cement and tile roofing systems are specifically vulnerable to mildew because they include minerals which are needed to support development.
That Site: Tucson roof repair - DCRoofingArizona.com http://kylerrfiw359.bearsfanteamshop.com/tips-for-applying-your-elastomeric-roof-coating
To safeguard your roofing, supply appropriate drainage and expose shaded areas to sunshine where possible. Susceptible areas that can not be fixed need to be cleaned with a chlorine bleach option twice each year. Tidy the roof surface area by power-washing or scrubbing with TSP (Trisodium Phosphate). Deal with mildewed locations with a chlorine bleach solution.
Follow the Kool Seal simple 3-Step Process for the Moss: very little plants that grow in silky, green clusters on damp surface areas. Mold: a downy or furry development on the roofing system surface caused by fungis, specifically in the existence of dampness or decay. Mildew: a fungi that can appear on a surface area when exposed to dampness, it appears as a thin, furry, whitish staining.
Technical Data Sheet Elastomeric Roof Coating
It is necessary to seal your roofing system as quickly as you see signs of alligatoring. If the surface area is left unguarded, it can degrade beyond a point where a roofing covering will work. Scrape off loose previous coating. Clean the roofing system with water and TSP (Trisodium Phosphate). Wash thoroughly and let dry.
Use to reinforce patching cement on all fractures. If your roofing system looks like this, see a roof professional and have it replaced. This is what happens to asphalt if it's left exposed and vulnerable. The very best method to avoid this from occurring to your roofing system is to spot and enhance all cracks with or.
Like Blister on your skin, blisters on a built-up roof (or BUR) take place when water gets trapped under the leading layers of the surface area. With a little bit of work you can eliminate this issue from your roof. If in doubt, seek advice from a qualified Roofing Specialist. Scrape off loose previous finishing.
Rinse thoroughly and let dry. On blistered locations, cut an X through the whole blister and enable wetness to vaporize and dry thoroughly prior to patching. Patch withor, the use to reinforce patching cement over the blister and on all fractures. Top coat with a for the very best performance. Visualized left is a condition called loose lap.
With a little bit of work you can remove this problem from your roof. If in doubt, seek advice from a qualified Roof Professional. Prepare the surface per bundle directions. Safe loose laps in place with, and then utilize to enhance patching cement on all fractures. Top coat with a or for the very best performance.
This condition is referred to as "fishmouthing". If left unattended, fishmouths may allow water penetration into the roof. With a little bit of work you can eliminate this problem from your roofing. If in doubt, seek advice from a qualified Roofing Expert. If loose edges extend back only a number of inches, the loose product might be snipped off and discarded.
Roof Coat Elastomeric Coating Product Data Sheet
Trim flaps so they lie flat. Seal with and strengthen with. Then leading coat the whole roof surface with a or for the best efficiency.
Inspect your Lexis roof covering system routinely. Keeping the roofing tidy and devoid of particles will give you optimal performance and longer life span. Retouch any harmed locations instantly to prevent substrate deterioration.
Hi everybody, I'm hoping someone can offer me some insightabout a month ago my beloved spouse, in an effort to assist me, painted the roof of my horse trailer with the silver seal aluminum covering. When he recognized the coating was diminishing the sides, he got the brilliant idea to just paint my entire (steel) trailer with it.
It's now a mahogany color. He also utilized a paint brush, so it's very streaky. Is there a method to eliminate this things? I have actually provided him a month to fix it, but it's show season and I require my trailer back! Can I just paint over it? The important things just cost me 3 grand, it doesn't have to be beautiful, would simply prefer for it to look a little better than if does presently! Any ideas would be great! Thanks beforehand!!! Sorry to be the bearer of problem but I do not know of a way to remove it.
I 'd state the best bet would be to put multiple coats of white paint over it. Yes the un mixed aluminum coat may bleed through, so you paint it once again. There are some products that will eliminate the asphalt, however they are very corrosive and would make an outright mess.
How To Apply Elastomeric Paint (With Pictures)
https://www.youtube.com/embed/XRomBIQqTVM
Waterproofing the RV roofing is among the most crucial things to do. It can make a big distinction between cost savings and losing money on major repair work. It is why Recreational Vehicle owners should apply a sealant to the roof frequently as a part of upkeep. However, there are times when you require to take the old sealant off, and replace it with a new one.
