
Jetcoat Cool King Reflective Acrylic Roof Coating, Waterproof
 Roof Coat Elastomeric Coating Product Data Sheet
If you think you'll be saving the roofing system decking plywood (not changing it), then you may conserve yourself some cleanup trouble by eliminating the components first and after that peeling up the rubber! Detail of water damage on camper roofing. More water damaged locations on Recreational Vehicle roof decking. There was absolutely nothing really horrible that made me seem like I was going to fall through, however definitely a lot of damage and I was getting the feeling I would be changing a great deal of the roofing system decking plywood.
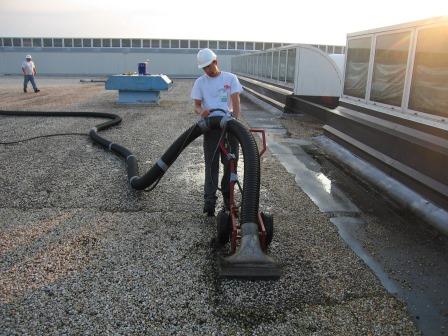 Tips For Specifying And Applying Elastomeric Coatings
Content: how much does it cost to repair roof leak http://andreszohf173.bravesites.com/entries/general/how-to-choose-the-best-elastomeric-roof-coating
I chose the easiest one first, a vent cap from a cooking area sink pipes vent pipeline. Starting to scrape caulk and sealant. I used a stiff scraper with a chisel-like blade and just began prying and breaking and scraping and hacking. There is no other way around this, you simply need to start digging up until you expose the screw heads.
Loosening the screws in vent cap. The screws on this vent cap were hex-head metal screws so I used a small socket motorist to remove them. Some came out tidy. Others were rusted and I had to utilize a vice-grip pliers to grab the heads and turn them little bit by little.
I found an old wasp nest inside the vent cover. This is a sight I'll probably have to get utilized to, discovering the remains of animal habitation in every nook and cranny. I invest a horrible lot of my time creating good wildlife habitat in my backyard so I do not get offended when a creature chooses to set up home in my Recreational Vehicle.
30 Roof Coating Ideas
Luckily nobody was home in this old nest so I just tossed it. Maybe I'll put a screen over it when replacing it. Which brings us to the next point. You must try not to damage these pieces (like vent covers and caps) as you're scraping off the old caulk and sealant simply in case you require to use them again.
(Think I'll find out when the roofing is done!) Prying up the vent cap and eliminating the last ring of rubber roof underneath. So I pried up the rest of the cap and scraped up the remaining rubber roofing and butyl tape and putty and 25 years of other gunk and here's how it looks cleaned up.
 10-year Premium White Elastomeric Roof Coating
One down, 7 more fixtures to go. Next I decided to tackle the only roofing ventilation fan that my camper has. My roof vent also had a vent cover over it. So I started scraping the gunk from those screws. Beginning on the roof vent. Hardware exposed on roofing vent cap, the very first nut came off clean.
 Elastomeric Roof Coating - Can You Apply It Yourself?
Bolt is spinning. The fasteners on this Recreational Vehicle roofing vent cover were nuts on small bolts. The first one came off great with an extension socket kit. The second one simply started spinning, suggesting the bolt was not fixed in place however turning together with the nut. Bummer. A peek at the hardware holding down the roofing vent cover.
Elastomeric Roof Coating
I didn't have any excellent way to hold the bolt in location so instead I opted to saw through the bolts with a reciprocating saw. Sawing through bolts on roof vent cover. I used a cordless reciprocating saw with a metal-cutting blade but it was difficult to get the blade flat sufficient to reach the bolts so near the roof deck. Most were so old and rusted that they sheared off when I unscrewed then with a great deal of force. Loosening the brackets that held the vent cover in place. Then I scraped more caulk and roof sealant off the flange of the roofing vent itself. I quickly discovered there disappeared screws or hardware holding it down so I provided up on the scraping and went inside the RV After scraping the caulk and sealant from flange of roofing system vent, say goodbye to screws! Unscrewing the within cover plate of roof vent fan in Recreational Vehicle bathroom.
A couple sheared off with a lot of force, but 2 wouldn't budge. So I had to drill out the screw heads. I selected a drill bit near the size of the shaft of the screws that I had already pulled out and started drilling. Choosing a drill bit for drilling out a screw head.
Shatterproof glass recommended. So I drilled out the heads, one popped off and the other I was getting annoyed with and offered it a yank prior to it was drilled through. Rather of popping off the screw head, the plastic simply melted away around the hot screw head. Whoops. Hope I do not need to recycle this cover.
If not, I'll require broader screw heads when re-assembling. Cover plate gotten rid of from roofing system vent. Next I found little corner brackets with hex-head bolts holding them in. I unscrewed them (all came out great luckily) and pulled out the brackets and little white plastic spacers. Loosening corner brackets in roofing system vent.
Instruction Tips – Black Jack Coatings
https://www.youtube.com/embed/S7EJlw_ql_Q
All corner brackets got rid of, ready to pull out. When the brackets were out I went back up leading to pry out the the roof vent. Then I scraped up all the remaining gunk and rubber roof. Raising off the old roof vent. There are two wires going to the roof vent (a black hot wire and a white neutral wire) that you'll require to clip to get rid of the old vent.
